Xiaomi's Redmi Note 5 Pro is a great device as it comes with a powerful hardware configuration. But there are a few things which it misses out on, or a few things which can be improved if you gain the Root access for your device. What's even better is that you can do that and your OTA updates will still not be affected as the custom recovery which we are going to use supports OTA updates. So let's get to the process.
Note: Rooting your device can be a risky thing if you are not familiar with all these things. So make sure you backup your data just in case something goes wrong and follow the guide carefully to avoid any issues.
Prerequisites: Unlocked Bootloader, ADB files, Recovery and Magisk files, PC.
1. Download the ADB files and the other files which are linked above. Keep them in a folder on your Desktop.
2. Enable the Developer Options in your device by going in to Settings - About Phone. Tap on "MIUI Version" 7 times to Enable the developer options. Now go back to Settings - Additional Settings - Developer Options. Enable the "USB Debugging" option from here.
3. Now Install the adb drivers in your PC which I have linked above. Run the "adb-setup.exe" file and type "y" when it prompts until It completes the installation.
4. After this, another window will pop up. Click Next and finish the installation.
5. Now Connect your device to your PC. If you see a prompt on your screen to Allow Debugging, Press Ok.
6. Now transfer the files which we downloaded, i.e., Magisk Manager Zip, Magisk Manager apk, and Lazy flasher zip to your phone's Internal Storage.
7. Now, extract the "platform tools" zip that we downloaded and copy the "twrp.img" file inside that platform tools folder. Make sure the platform tools folder has several other files along with the twrp file so that it does not give an error.
Note : You can also use the Redwold TWRP "Redwolf-Unofficial-whyred-2803.img" also. But note that Redwolf's decyption support is yet to be added).
8. Now switch off your phone. Once it is switched off, we need to enter the Fastboot mode. To do that, press the "Power + Vol Down" button on your device together until it vibrates and shows the Fastboot screen.
9. Now open the platform tools folder on your PC in which the recovery file is also there. Hold down the shift button on your keyboard and right click in that folder in any empty space. A menu will appear. Choose the "Open Powershell/Command Window Here" option.
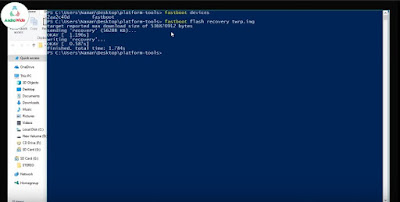
10. Now a window will open up with Black/Blue background. Type in the following command "fastboot devices" and press Enter. The inputs are case sensitive so please be careful.
If your device is detected successfully, then you will see a random string.
11. Now we need to flash the recovery file. Choose whichever recovery file you want out of the two, and type this command : "fastboot flash recovery xx.img" Replace the "xx" with the exact name of your recovery that is present in the folder. Press Enter.
The recovery file will get flashed now.
12. Now we need to get into the Recovery to flash the magisk file. So, type the command "fastboot boot xx.img" Replace the xx with recovery name that you have used. Now your phone will boot into the recovery. If prompted, "Swipe to allow modifications".
13. Now go to "Install", then navigate to Internal storage and flash the "Magisk Manager" zip file that we copied in the Internal storage. On next screen, Swipe to confirm flash.
If you used Official twrp (twrp.img), then do this : Press back and flash the "lazy flasher" zip file also.
14. Now go back to main menu in recovery. Select Reboot - System.
Now your phone will boot into system normally. Once it is opened, you can download the "Root Checker" app to check the root status.
Also, Install the "Magisk Manager" apk file from your Internal Storage to keep a track of which app is using root permission.
Now you have successfully gained root access on your device. In the next blog, we'll discuss what all benefits you can have if you have root access.


0 comments:
Post a Comment